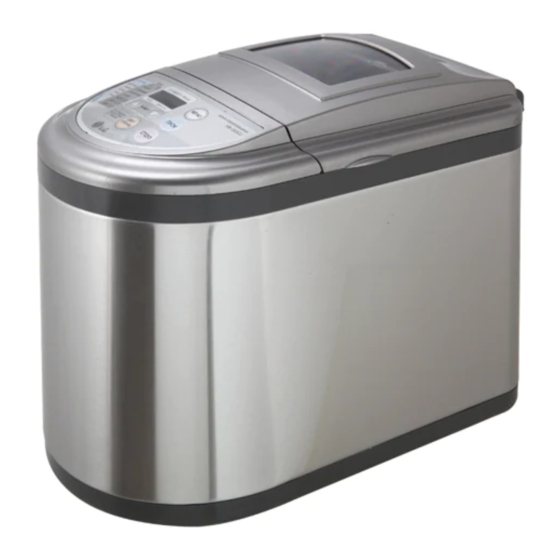
Summary of Contents for LG HB-155CJ
- Page 1 BREADMAKER SERVICE MANUAL CAUTION BEFORE SERVICING THE UNIT, READ THE SAFETY PRECAUTIONS IN THIS MANUAL. MODEL : HB-155CJ / 205CJ...
-
Page 3: Table Of Contents
CONTENTS PREFACE 1. SAFETY PRECAUTIONS ..........................4 2. SERVICING PRECAUTIONS ........................4 3. INSTALLATION INSTRUCTIONS .......................4 4. SPECIFICATIONS ............................5 OPERATION INSTRUCTIONS 1. FEATURES AND CONTROL PANEL A. FEATURES..............................6 B. CONTROL PANEL...........................7 2. OPERATION CHECK ..........................8 3. BREADMAKING PROGRAM........................10 DISASSEMBLY INSTRUCTIONS ......................12 TROUBLESHOOTING GUIDE A. -
Page 4: Preface
PREFACE 1. SAFETY PRECAUTIONS Follow basic safety precautions before using electrical appliances. 1. READ ALL INSTRUCTIONS. 2. To protect against electrical shock, do not immerse cord, plug, or appliance in water or other liquid. 3. Do not touch hot surfaces. Always use oven mitts when handling the hot bread pan of bread. 4. -
Page 5: Specifications
4. SPECIFICATIONS DESCRIPTION AUTOMATIC BREADMAKER MODEL REFER TO THE COVER PAGE POWER SUPPLY INDICATED ON THE RATING LABEL POWER MAIN HEATER 550W CONSUMPTION KNEADING MOTOR 100W DIMENSIONS (W×D×H) APPROX. 13 ″ × 9 ″ ×13 ″ ( 23.2×39.2×33cm) WEIGHT APPROX. 14.4lb.(7.4kg) TIMER 4:10 TO 13:00 HOURS DIGITAL TIMER CORD LENGTH... -
Page 6: Operation Instructions
OPERATING INSTRUCTIONS 1. FEATURES AND CONTROL PANEL A. FEATURES Bread Pan Handle Handle Viewing Window Kneading Blade (Flat side down) Air Exhaust Bread Pan (Air is vented through these outlets) Shaft Control Panel (Rotates the kneading blade) ACCESSORIES Measuring Cup Measuring Spoon (OPTION) -
Page 7: Control Panel
B. CONTROL PANEL... -
Page 8: Operation Check
(b) The REMAINING TIME display and Russian cook is set already. (c) Check the PROGRAM SELECT. Press the MENU pad, then REMAINING TIME will advance as follows: MODEL REMAINING TIME displays HB-155CJ 205CJ RUSSIAN COOK BASIC BREAD SPECIALTY BREAD FRENCH BREAD... - Page 9 1. TEST KEY PROGRAM CHECK You can check the operating of each load by using the self-diagnosis program. (a) OPERATION CHECK 1) When power is supplied while pressing the TIMER UP PAD ( ▲ ) and TIMER DOWN PAD ( ▼ ) at the same time, the self-diagnosis program will start.
-
Page 10: Breadmaking Program
3. BREADMAKING PROGRAM 3-1) EXPLANATION OF BASIC PROGRAM (Russian Cook) -10-... - Page 11 3-2) PROGRAM SPECIFICATIONS 1. The Russian Cook Specialty Bread, and French Bread Programs contain an audible signal (8 beeps) Which sounds 9 minutes before the end of the 2nd knead (5 minutes before the end of the 2nd knead for Rapid program). For specialty bread, add additional ingredients at this time (i.e.
-
Page 12: Disassembly Instructions
DISASSEMBLY INSTRUCTION PAY ATTENTION TO THE FOLLOWING IN SERVICE AND INSPECTION. (a) Protect against electric shock: Pull out the plug for service and inspection. Don’t touch live components when service and inspection are made. (b) Restore the original conditions of components and wire layout; Safety provisions are made by using tube and the other insulation material and by preventing wire from contact with heat generating or movable components by means of layout and binding. - Page 13 Ture the breadmaker upside down. Remove four lege and base cover by unscrewing. Pull out the power cord assembly on the bottom of the unit. Remove the chassis assembly from the out case. Remove the poly V-belt. Remove nut and pulley washer, then kneading pulley can be disconnected.
- Page 14 Turn the chassis upside down and remove the oven base and the capacitor. CAUTION When you reassemble the kneading pulley, poly V-belt, and motor pulley after service or repair; adjust the center of the kneading pulley, poly V-belt, and motor pulley as follows. Moter Pulley Screw Kneading...
-
Page 15: Checking Points Before Service
TROUBLESHOOTING GUID When you get a complaint from your customer, evaluate the complaint carefully before going to the customer’s home. If there are the following symptoms, please instruct the customer for the proper use of the breadmaker. This can save an unneces-sary service call. A. -
Page 16: Troubleshooting Guide Except Circuit Board
B. TROUBLESHOOTING GUIDE EXCEPT CIRCUIT BOARD (TROUBLE 1) Breadmaker does not operate. -16-... - Page 17 -17-...
- Page 18 -18-...
- Page 19 (TROUBLE 2) Poor bread is made. -19-...
- Page 20 -20-...
- Page 21 -21-...
- Page 22 -22-...
- Page 23 (TROUBLE 3) Other problems. -23-...
- Page 24 (TROUBLE 4) Some letter is displayed on remaining time display -24-...
-
Page 25: Failure Diagnosis Of The Circuit Board
C. FAILURE DIAGNOSIS OF THE CIRCUIT BOARD -25-... - Page 26 -26-...
-
Page 27: Block Diagram
BLOCK DIAGRAM P.W.B. ASM OVEN FUSE MOTOR HEATER BAKING SENSOR (230V/50Hz Only) REMARKS :HOUSING :TERMINAL BLOCK -27-... -
Page 28: Schematic Diagram
SCHEMATIC DIAGRAM -28-... -
Page 29: Controller Parts List
CONTROLLER PARTS LIST PART NO LOCA. DESCRIPTION REMARK MARK HB-155CJ HB-205CJ Q’TY Q’TY -29-... -
Page 30: Exploded View & Parts List
EXPLODED VIEW & PARTS LIST A. EXPLODED VIEW HB-155CJ HB-205CJ -30-... - Page 31 ACCESSORY -31-...
-
Page 32: Parts List
B. PARTS LIST LOCA PART NO. DESCRIPTION REMARKS HB-155CJ HB-205CJ Q'TY TOP COVER ASS'Y 3551FB2236A 3551FB2236A 4781FB2237A 4781FB2237B CONTROLLER ASS'Y 4781FB2237H 4781FB2237J 4781FB2237S 4781FB2237T 3572FB9112A 3572FB9113A CONTROL PANL ASS'Y 3572FB9112B 3572FB9113B 3572FB9112C 3572FB9113C P.W.B ASM 6871FB2247A 6871FB2247A 230V/50Hz KNEADING BLADE... - Page 33 -33-...
- Page 34 JUL. 2003 Printed in Korea P/NO.: 3828FB5051D...


