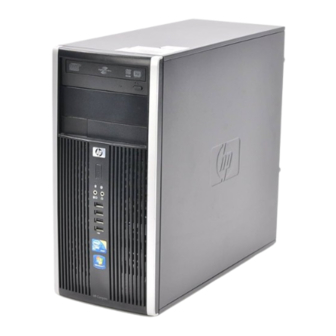
HP Compaq 6000 Pro All-in-One Getting Started Manual
Business pcs and personal workstations
Hide thumbs
Also See for Compaq 6000 Pro All-in-One:
- Maintenance and service manual (257 pages) ,
- Maintenance & service manual (125 pages) ,
- Troubleshooting manual (67 pages)
Table of Contents
Advertisement
Quick Links
Advertisement
Table of Contents

Summary of Contents for HP Compaq 6000 Pro All-in-One
-
Page 1: Getting Started
Getting Started HP Business PCs and Personal Workstations... - Page 2 Windows 7 are either trademarks or registered trademarks of Microsoft Corporation in the United States and/or other countries. The only warranties for HP products and services are set forth in the express warranty statements accompanying such products and services. Nothing herein should be construed as constituting an additional warranty.
-
Page 3: About This Book
Select Start > All Programs > HP Safety and Comfort Guide. ▲ Accessing User Guides (Linux systems) Locate the desktop icon labeled HP User Manuals and double-click. Select the folder for your language. Select the guide you wish to access. How to Check Warranty and Support Entitlement Your warranty is available on the hard drive (some models). - Page 4 About This Book ENWW...
-
Page 5: Table Of Contents
Launching Windows XP from Windows 7 ... 2 Accessing Disk Image (ISO) Files ... 2 Setting up Red Hat Enterprise Linux (HP Workstations only) ... 2 Installing with the HP Driver CD ... 3 Installing and Customizing Red Hat-enabled Workstations ... 3 Verifying Hardware Compatibility ... - Page 6 ENWW...
-
Page 7: Getting Started
If the computer was shipped with Windows Vista or Windows 7 loaded, you will be prompted to register the computer with HP Total Care before installing the operating system. You will see a brief movie followed by an online registration form. Fill out the form, click the Begin button, and follow the instructions on the screen. -
Page 8: Installing Or Upgrading Device Drivers (Windows Systems)
Setting up Red Hat Enterprise Linux (HP Workstations only) HP offers an HP Installer Kit for Linux (HPIKL) to supplement Red Hat box sets and help HP Linux customers customize their system image. The HPIKL contains the HP driver CD and device drivers to... -
Page 9: Installing With The Hp Driver Cd
Linux CDs are currently available for download at http://www.hp.com/support/workstation_swdrivers. Installing with the HP Driver CD To install the HP driver CD, see “Installing with the HP Installer Kit for Linux” in the HP Workstations for Linux manual at http://www.hp.com/support/workstation_manuals. Installing and Customizing Red Hat-enabled Workstations Linux-enabled workstations require the HP Installer Kit and the purchase of a Red Hat Enterprise Linux box set. -
Page 10: Accessing Hp Vision Diagnostics (Windows Systems)
Third party devices may not be detected by HP Vision Diagnostics. Accessing HP Vision Diagnostics (Windows systems) To access HP Vision Diagnostics, you must burn the utility onto a CD then boot to the CD. It can also be downloaded from... -
Page 11: Turning Off The Computer
Computer Setup utility. Finding More Information The following publications are available on the computer hard drive. To access the publications, select Start > All Programs > HP User Manuals. NOTE: Not all of the publications listed are included on all models. -
Page 12: Before You Call For Technical Support
The Drive Protection System (DPS) Self-Test software is available on some models only. ● Double-click the HP Support Assistant icon on the Windows 7 desktop and run the automated diagnostics. ● Check the power LED on the front of the computer to see if it is flashing or listen for a series of beeps emanating from the computer. -
Page 13: Helpful Hints
● Remove any software that was recently installed. NOTE: For sales information and warranty upgrades (HP Care Pack), call your local authorized service provider or dealer. Helpful Hints If you encounter problems with the computer, monitor, or software, see the following list of general suggestions before taking further action: ●... -
Page 14: Basic Troubleshooting
See support and troubleshooting information, enter the model number of the computer, and press Enter. HP Support Assistant HP Support Assistant is an HP application that helps you maintain the performance of your computer and resolve problems through automated updates and tune-ups, built-in diagnostics, and guided assistance To access HP Support Assistant, double-click the HP Support Assistant icon on your desktop. -
Page 15: Restore And Recovery
Restore and Recovery Microsoft System Restore If you have a problem that might be due to software that was installed on your computer, use System Restore to return the computer to a previous restore point. You can also set restore points manually. NOTE: Always use this System Restore procedure before you use the System Recovery program. -
Page 16: System Recovery Options
Through the hard disk drive, from the Windows Start menu. Through the hard disk drive, by pressing the Through recovery discs that you create. Through recovery discs purchased from HP Support. To purchase recovery discs, visit http://www.hp.com/support. System Recovery from the Windows Start Menu CAUTION: System Recovery deletes all data and programs you created or installed. -
Page 17: System Recovery From Recovery Discs
System Recovery begins. After System Recovery is complete, click Finish to restart the computer. Complete the registration process, and wait until you see the desktop. Turn off the computer, reconnect all peripheral devices, and turn the computer back on. System Recovery from Recovery Discs CAUTION: System Recovery deletes all data and programs you created or installed. -
Page 18: Choosing Recovery Discs
● Get help and support for your specific model ● Install HP support software for your computer ● Purchase supplies and accessories for your computer To access the centralized PC management location, click Start > Devices and Printers then double- click on the picture of your PC.


