Advertisement
Quick Links
en-us_main.book.book Page 1 Friday, February 16, 2024 1:13 PM
INSTALLATION MANUAL
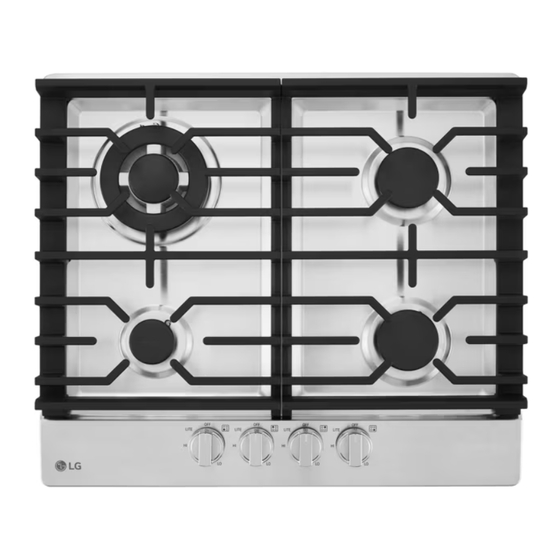
COOKTOP
Read this owner's manual thoroughly before operating the
appliance and keep it handy for reference at all times.
ENGLISH
CBGD2414S
www.lg.com
MFL72083402
Copyright © 2010-2018 LG Electronics Inc. All Rights Reserved.
Rev.00_MMDDYY
Advertisement

Summary of Contents for LG CBGD2414S
- Page 1 Page 1 Friday, February 16, 2024 1:13 PM INSTALLATION MANUAL COOKTOP Read this owner's manual thoroughly before operating the appliance and keep it handy for reference at all times. ENGLISH CBGD2414S www.lg.com MFL72083402 Copyright © 2010-2018 LG Electronics Inc. All Rights Reserved. Rev.00_MMDDYY...
-
Page 2: Table Of Contents
en-us_main.book.book Page 2 Friday, February 16, 2024 1:13 PM TABLE OF CONTENTS IMPORTANT SAFETY INSTRUCTIONS READ ALL INSTRUCTIONS BEFORE USE WARNING STATEMENTS INSTALLATION Before Installing Installing the Cooktop 13 APPENDIX Checking Operation... -
Page 3: Important Safety Instructions
en-us_main.book.book Page 3 Friday, February 16, 2024 1:13 PM IMPORTANT SAFETY INSTRUCTIONS IMPORTANT SAFETY INSTRUCTIONS READ ALL INSTRUCTIONS BEFORE USE Safety Messages Your safety and the safety of others are very important. We have provided many important safety messages in this manual and on your appliance. Always read and follow all safety messages. - Page 4 en-us_main.book.book Page 4 Friday, February 16, 2024 1:13 PM IMPORTANT SAFETY INSTRUCTIONS • If cabinets are located above the cooktop, allow a minimum clearance of 30″ between the cooking surface and the bottom of unprotected cabinets. • If a 30″ clearance between cooking surface and overhead combustible material or metal cabinets cannot be maintained, protect the underside of the cabinets above the cooktop with not less than 1/4″...
-
Page 5: Installation
en-us_main.book.book Page 5 Friday, February 16, 2024 1:13 PM INSTALLATION INSTALLATION Before Installing In the Commonwealth of Massachusetts Before You Begin • This product must be installed by a licensed plumber or gas fitter. Read these instructions completely and carefully. Improper installation, adjustment, alteration, •... - Page 6 Make sure wall coverings, countertop and cabinets around cooktop can withstand the heat (up to 194 ℉) generated by the cooktop To ensure accuracy, it is best to make a template when cutting the opening in the counter Dimension/Clearance CBGD2414S Width of upper plate 23 3/8" (594 mm) Depth of upper plate 20 1/4"...
-
Page 7: Installing The Cooktop
Page 7 Friday, February 16, 2024 1:13 PM INSTALLATION Dimension/Clearance CBGD2414S Distance between cutout and the wall behind the cooktop 3 3/8" (85 mm) Width of unprotected overhead cabinets 24" (610 mm) Depth of unprotected overhead cabinets 13" (330 mm) Clearance from countertop to unprotected overhead surface 30"... - Page 8 I.D. of 5/8” and must be a maximum of 3 Sponge feet in length for easy installation. In Canada, flexible connectors should be single wall metal CBGD2414S connectors less than 6 feet in length. 2. Connecting the Cooktop to Gas Shut off the main gas supply valve before removing the old cooktop and leave it off until the new hook-up has been completed.
- Page 9 en-us_main.book.book Page 9 Friday, February 16, 2024 1:13 PM INSTALLATION If a manometer is not available, turn the gas Pressure Regulator supply to the cooktop on and use a liquid leak Adapter detector at all joints and connections to check for leaks.
- Page 10 en-us_main.book.book Page 10 Friday, February 16, 2024 1:13 PM 10 INSTALLATION 5. Assembling the Surface Burners grounding wall receptacle to reduce the possibility of electric shock hazard from this appliance. The customer should have the wall receptacle and CAUTION circuit checked by a qualified technician to be sure •...
- Page 11 en-us_main.book.book Page 11 Friday, February 16, 2024 1:13 PM INSTALLATION 8. Adjusting the Surface Burner Low They will stack up and be placed unevenly when you locate wrong direction. See the illustration Flame (Simmer) Setting below. Light all surface burners. Turn the knob on the burner being adjusted to LO (LOW).
- Page 12 en-us_main.book.book Page 12 Friday, February 16, 2024 1:13 PM 12 INSTALLATION After setting the low flame, turn off the burner.
-
Page 13: Appendix
en-us_main.book.book Page 13 Friday, February 16, 2024 1:13 PM APPENDIX APPENDIX Checking Operation Final Check When All Hookups are Complete Make sure all controls are left in the off position. Make sure the flow of combustion and ventilation air to the cooktop is unobstructed. Converting to LP Gas (or Converting Back to Natural Gas from LP) This cooktop leaves the factory set for use with... - Page 14 Page 14 Friday, February 16, 2024 1:13 PM LG Customer Information Center For inquiries or comments, visit www.lg.com or call: U.S.A. 1-800-243-0000 1-888-542-2623 CANADA Register your product Online! www.lg.com...


