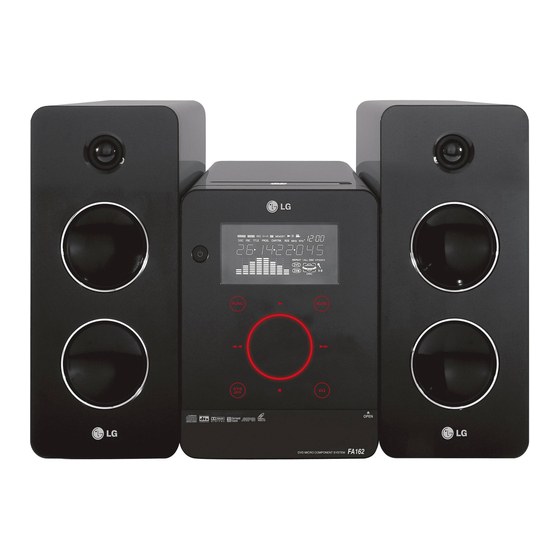
LG FA162 Owner's Manual
Micro hi-fi system
Hide thumbs
Also See for FA162:
- Service manual (65 pages) ,
- Owner's manual (20 pages) ,
- Owner's manual (16 pages)
Table of Contents
Advertisement
LGEUK_FA162_JA4ULLN_ENG_MFL36264611
MICRO Hi-Fi SYSTEM
OWNER'S MANUAL
MODEL: FA162
FA162-A0U/D0U/X0U
FAS162F
Before connecting, operating or adjusting this product,
please read this instruction booklet carefully and completely.
FOR THE WARRANTY TERMS & CONDITIONS,
PLEASE REFER TO BACK COVER OF THIS MANUAL.
USB
Advertisement
Table of Contents

Summary of Contents for LG FA162
- Page 1 LGEUK_FA162_JA4ULLN_ENG_MFL36264611 MICRO Hi-Fi SYSTEM OWNER’S MANUAL MODEL: FA162 FA162-A0U/D0U/X0U FAS162F Before connecting, operating or adjusting this product, please read this instruction booklet carefully and completely. FOR THE WARRANTY TERMS & CONDITIONS, PLEASE REFER TO BACK COVER OF THIS MANUAL.
-
Page 2: Safety Precaution
Safety Precaution Do not overload wall outlets. Overloaded wall outlets, loose or damaged wall outlets, extension cords, frayed power cords, or CAUTION damaged or cracked wire insulation are dangerous. Any of these conditions could result in electric shock or fire. Periodically exam- RISK OF ELECTRIC SHOCK ine the cord of your appliance, and if its appearance indicates DO NOT OPEN... -
Page 3: Table Of Contents
Before use Contents About the symbols for Before use instruction About the Symbols for instruction / Indicates hazards likely to cause harm to Notes on Discs .....3 the unit itself or other material damage. -
Page 4: Front / Back Panel
Front / Back Panel OPEN (POWER) 15. > (SKIP) TUN. (+) (TUNER) 2. VOLUME* 16. Z (OPEN/CLOSE) 3. FUNC. (FUNCTION) (FM, AM, CD, USB, AUX) USB connector 4. .(SKIP) 18. PHONES TUN. (-) (TUNER) (Headphone jack : 3.5mm) 5. XTS pro 19. -
Page 5: Remote Control
Remote Control DIMMER button MUTE button DISP.MODE (DISPLAY MODE) button POWER button • USB button • FUNCTION button PRESET/ FOLDER ( ) buttons VOLUME CONTROL( ) buttons CLOCK button SLEEP button PLAY/PAUSE ( B B / [] ) button • STOP ( x )/ MO./ST. -
Page 6: Connections
Connections Speaker System Connection Connect the speaker cables to the speaker terminal. Front Front speaker (R) speaker (L) Notes: • Be sure to match the speaker cable to the appropriate terminal on the components: + to + and – to –. If the cords are reversed, the sound will be distorted and will lack base. -
Page 7: Antenna (Aerial) Connections
Antenna (Aerial) Connections Compatible Devices Connect the supplied FM/AM antennas for radio 1. Devices which require additional program reception. installation when you connect it to a comput- er, are not supported. FM wire antenna (supplied) 2. MP3 Player : Flash type MP3 player. •... -
Page 8: Setting The Clock
Setting the Clock 7. Set the minute to switch on by tapping ./> on the front panel. 1. Press CLOCK. 8. Press SET. 2. Select a 24 hour time system or a 12 hour - “OFF TIME” indicator appears for about time system by tapping ./>. -
Page 9: Audio Adjustment
Audio Adjustment MP3 Optimizer This function optimizes for compressed MP3 Headphone jack files. It improves the bass sound to make sweet Connect a stereo headphone plug ( 3.5mm) into sound. Each time you press XDSS plus. the headphone jack to listen to the sound through The setting changes in the following order. -
Page 10: Presetting The Radio Stations
Presetting the Radio Stations Listening to the Radio You can preset 50 stations for FM and AM. 1. Press FUNCTION to select the frequency 1. Press FUNCTION to select the frequency (AM or FM) you want. (AM or FM) you want. The last received station is tuned in. -
Page 11: Rds Function - Optional
RDS Function - OPTIONAL Programme Search (PTY) A major benefit of RDS is its ability to encode broadcasts with Programme Type (PTY) codes About RDS that indicate the type of material being broadcast. This unit is equipped with RDS (Radio Data The following list shows the abbreviations used to System), which brings a wide range of informa- indicate each PTY along with an explanation of... -
Page 12: Cd Playback
REPEAT CD Playback Press REPEAT during playback. Basic Playback Audio CD 1. Use FUNCTION to select CD function. RPT 1 : To play one track repeatedly. If no disc is loaded then “NO DISC” is displayed. RPT ALL : To play all tracks repeatedly. 2. -
Page 13: To Program Play
To Program Play About MP3/ WMA You can arrange the order of the tracks on the MP3/ WMA Disc compatibility with this unit is discs and create your own program. The pro- limited as follows: gram can contain up to 20 tracks. 1. -
Page 14: Reference
Reference Troubleshooting Symptom Causa Correction No power The power cord is disconnected. Plug the power cord into the wall outlet securely. No sound The power of the external source Switch on the external source equipment is switched off. equipment. The unit does No disc is inserted. -
Page 15: Specifications
Specifications Power supply Refer to the back panel of the unit. Power consumption Refer to the back panel of the unit. Net Weight 3.31 kg External dimensions (WxHxD) 170 X 253 X 265 mm Frequency response 20 - 20000 Hz Signal-to-noise ratio 75 dB Dynamic range... - Page 16 2. The dealer (or his service agent) who sold the product will be reimbursed for any labour provided in the repair of this LG equipment, for a period of 12 months from the original date of purchase. These claims must be made in accordance with the published scale of service charges and relevant claims procedure.


