Sign In
Upload
Manuals
Brands
Bosch Manuals
Keypad
D1265
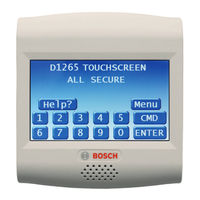
Bosch D1265 Touch Screen Keypad Manuals
Manuals and User Guides for Bosch D1265 Touch Screen Keypad. We have
4
Bosch D1265 Touch Screen Keypad manuals available for free PDF download: Owner's Manual, User Manual, Installation Manual, Quick Manual
Bosch D1265 Owner's Manual (92 pages)
Touchscreen Keypad
Brand:
Bosch
| Category:
Keypad
| Size: 5.92 MB
Table of Contents
Table of Contents
3
Figure 1: D1265 Touchscreen Numerical
6
Introduction
6
Your Keypad
6
Part I: Security System Basics
7
Using the Keypad
7
Table 1: D1265 Keypad Buttons
7
Command ENTER Buttons
7
Points
7
What Is a Point
7
Controlled Points
7
24-Hour Points
7
Your Custom Display
9
View Faulted or Bypassed Points
10
To Scroll Faulted or Bypassed Points
10
Warning Displays and Tones
10
Keypad Quiets for Button Presses
10
Priority of Events
10
Fire Alarms
11
Silencing Fire Alarms
11
Burglary Alarms
12
Silencing Burglary Alarms
12
Fire Trouble and Fire Supervisory Events
12
Silencing Fire Trouble and Fire Supervisory Conditions
12
Special Fire Trouble and Fire Supervisory Display
12
Viewing Fire Trouble and Fire Supervisory Conditions
12
Non-Fire Trouble and Supervisory Events
13
Silencing Non-Fire Trouble and Supervisory Events
13
Viewing Non-Fire Trouble Events
13
Special System Trouble Display
13
Events Cleared from the Keypad Are Not Lost
13
Entry Delay Tone and Display
13
Exit Delay Tone and Display
13
Button Press Checking Tones
13
Silencing an Alarm
13
To Silence an Alarm
13
How Your System Reports Alarms
14
Table 2: Keypad Commands
15
Part II: System Commands
15
Passcode Protected Commands and Functions
16
Turning the System on (Arming)
16
To Turn Your Security System on (Arm)
16
Turning the System off (Disarming)
16
To Turn Your Security System off (Disarm)
16
Turning on the System (Arming) with a Duress Passcode
17
Turning on the System (Arming) with Doors or Windows Open
17
Master Arm (CMD + 1)
19
Description
19
Using Master Arm
19
Master Arming All Areas
20
Master Arm Instant (CMD + 1 + 1)
21
Perimeter Instant (CMD + 2)
21
Turn on the Perimeter with no Delays
21
Using Perimeter Instant
21
Perimeter Delay (CMD + 3)
22
Turn on the Perimeter with Delays
22
Silence Trouble Sound/Clear Trouble Display (CMD + 4)
23
Description
23
Using CMD 4
23
View Alarm Memory (CMD + 4 + 0)
23
Using View Alarm Memory
23
Walk Test (CMD + 4 + 4)
24
Reset Sensors (CMD + 4 + 7)
25
Using Reset Sensors
25
Watch Mode (CMD + 6)
26
Using Watch Mode
26
Entering Watch Mode
26
Exiting Watch Mode
26
Perimeter Partial (CMD + 8)
27
Partially Turn on the Perimeter
27
Using Perimeter Partial
27
Special Alerts (CMD + 7 and CMD + 9)
28
Using CMD 7
28
Using Command 9
29
Part III: Advanced Commands
30
Advanced Commands
30
Bypass a Point (CMD + 0)
31
Description
31
Using Bypass a Point
31
Unbypass a Point (CMD + 0 + 0)
33
Description
33
Using Unbypass a Point
33
Send Report (CMD + 4+1 or 4+2)
34
Description
34
Using Send Report
34
Remote Program (CMD + 4 + 3)
35
Description
35
For Systems Without a Phone Number
35
For Systems with a Phone Number Configured
36
For Systems with a Network Connection
36
Change Time/Date (CMD + 4 + 5)
37
Door Control (CMD + 4 + 6)
39
Description
39
Using Door Control
39
Table 3: Door Status
39
Access Level
41
Change Display (CMD + 4 + 9)
42
Show Continuous Time/Date
42
Extend Closing (CMD + 5 + 1)
42
Chg Skeds (CMD + 5 + 2)
44
Description
44
Using Chg SKEDS
44
Table 4: Sked Table
45
Delete User (CMD + 5 + 3)
46
Change Relay (CMD + 5 + 4)
47
Change Passcode (CMD + 5 + 5)
47
Description
47
Using Change Passcode
47
Add/Change User (CMD + 5 + 6)
48
Add/Change Card
54
Add/Change Sub-User ID
54
Default Text (CMD + 5 + 7)
55
Fire Test (CMD + 5 + 8)
55
Display Rev (CMD + 5 + 9)
57
Service Menu (9 + 9 + Enter)
57
Using View Log
58
Using Print Log
58
Using Display Revision
58
Using Service Walk Test
59
Using Default Text
59
Keypad Setup Menu
59
Part IV: Multi-Area Use
60
Working with Multiple Areas from a Single Keypad
60
View Area Status
60
Table 5: Screen Area Definitions
61
View Point Status
61
Move to Area (CMD + 5 + 0)
62
Turning on the System
62
Turning on Selected Areas
62
Turning on Multiple Areas with a Passcode
63
Faulted Points in Other Areas
63
Turn on the Entire System Without Delays
64
Turning on All or Selected Areas
64
Turning off the System
65
Turning off Multiple Areas with a Passcode
65
Turning off Multiple Areas with Disarm All
65
Turning off Selected Areas
66
Appendix
67
Supplementary Information for Adding Passcodes
67
User Authority Levels
67
Passcode Worksheet
67
User Interface
67
User Interface
68
User (Passcode) Worksheet (User 000 to 038)
69
User (Token) Worksheet (User 000 to 038) D9412GV3/D7412GV3/D9412GV2/D7412GV2 Only
70
User (Passcode) Worksheet (User 039 to 075)
71
User (Token) Worksheet (User 039 to 075) D9412GV3/D7412GV3/D9412GV2/D7412GV2 Only
72
User (Passcode) Worksheet (User 076 to 114) (101-249 = D9412GV3/D9412GV2 Only)
73
User (Token) Worksheet (User 076 to 114) D9412GV3/D7412GV3/D9412GV2/D7412GV2 Only (101-249 = D9412GV3/D9412GV2 Only)
74
User (Passcode) Worksheet (User 115 to 150) (101-249 = D9412GV3/D9412GV2 Only)
75
User (Token) Worksheet (User 115 to 150) (101-249 = D9412GV3/D9412GV2 Only)
76
User (Passcode) Worksheet (User 151 to 189) (101-249 = D9412GV3/D9412GV2 Only)
77
User (Token) Worksheet (User 151 to 189) (101-249 = D9412GV3/D9412GV2 Only)
78
User (Passcode) Worksheet (User 190 to 226) (101-249 = D9412GV3/D9412GV2 Only)
79
User (Token) Worksheet (User 190 to 226) D9412GV3/D7412GV3/D9412GV2/D7412GV2 Only (101-249 = D9412GV3/D9412GV2 Only)
80
User (Passcode) Worksheet (User 227 to 249) (101-249 = D9412GV3/D9412GV2 Only)
81
User (Token) Worksheet (User 227 to 249) (101-249 = D9412GV3/D9412GV2 Only)
82
User (Passcode) Worksheet (Blank)
83
User (Token) Worksheet (Blank)
84
Security System Limitations
84
Figure 2: Smoke Detector Locations (Plan View)
85
Figure 3: Smoke Detector Locations (Elevation View)
85
Figure 4: Escape Route
85
Fire Safety and Evacuation
85
Standard Displays
86
System Trouble Displays
87
Service Printer
88
Security System Glossary
89
Maintenance and Service
90
How to Clean the Keypad
90
Your Alarm Company
90
Advertisement
Bosch D1265 User Manual (36 pages)
Touchscreen Keypad
Brand:
Bosch
| Category:
Keypad
| Size: 3.23 MB
Table of Contents
Table of Contents
3
Part I: Security System Basics
4
Using the Keypad
4
Keypad Buttons
4
Points
5
What Is a Point
5
Controlled Points
5
Perimeter Points
5
Interior Points
5
24-Hr Points
5
Fire Points
5
Non-Fire Points
5
Your Custom Display
6
View Faulted or Bypassed Points
7
To Scroll Faulted or Bypassed Points
7
Warning Displays and Tones
7
Keypad Quiets for Button Presses
7
Priority of Events
7
Fire Alarms
8
Silencing Fire Alarms
8
Burglary Alarms
9
Silencing Burglary Alarms
9
Fire Trouble and Fire Supervisory Events
9
Silencing Fire Trouble and Fire Supervisory Conditions
9
Special Fire Trouble and Fire Supervisory Displays
9
Viewing Fire Trouble and Fire Supervisory Conditions
9
Non-Fire Point Trouble and Supervisory Events
9
Silencing Non-Fire Trouble and Supervisory Events
10
Viewing Non-Fire Trouble Events
10
Special System Trouble Display
10
Events Cleared from the Keypad Are Not Lost
10
Entry Delay Tone and Display
10
Exit Delay Tone and Display
10
Button Press Checking Tones
10
Silencing an Alarm
10
To Silence an Alarm
10
How Your System Reports Alarms
11
Part II: System Commands
12
Passcode Protected Commands and Functions
13
Turning the System on (Arming)
13
To Turn Your Security System on (Arm)
13
Turning the System off (Disarming)
13
To Turn Your Security System off (Disarm)
13
Turning the System on (Arming) with a Duress Passcode
14
Turning the System on (Arming) with Doors or Windows Open
14
Master Arm (CMD + 1)
16
Description
16
Using Master Arm
16
Master Arming All Areas
17
Perimeter Instant (CMD + 2)
18
Using Perimeter Instant
18
Perimeter Delay (CMD + 3)
18
Turn on the Perimeter with Delays
18
Using Perimeter Delay
18
Silence Trouble Sounder/Clear Trouble Display (CMD + 4)
19
Description
19
Using CMD 4
19
View Alarm Memory (CMD + 4 + 0)
20
Walk Test (CMD + 4 + 4)
21
Reset Sensors (CMD + 4 + 7)
22
Using Reset Sensors
22
Watch Mode (CMD + 6)
23
Description
23
Entering Watch Mode
23
Perimeter Partial (CMD + 8)
23
Partially Turn on the Perimeter
23
Special Alerts (CMD + 7, CMD + 9)
24
Description
24
Using CMD 7
24
Using CMD 9
25
Bypass a Point (CMD + 0)
25
Description
25
Using Bypass a Point
25
Unbypass a Point (CMD + 0 + 0)
27
Description
27
Using Unbypass a Point
27
Appendix
29
Security System Limitations
29
Fire Safety and Evacuation
29
Standard Displays
31
System Trouble Displays
32
Security System Glossary
34
Bosch D1265 Installation Manual (10 pages)
Touchscreen Keypad
Brand:
Bosch
| Category:
Keypad
| Size: 0.86 MB
Table of Contents
Table of Contents
2
1 Introduction
3
Overview
3
Graphical Buttons
3
Audible Tones
4
Supervision
4
Tamper Switch
4
2 Installation
5
3 Setup Menu
6
Set the Keypad SDI Bus Address
6
Adjust the Keypad Volume and Display
6
Adjust the Keypad Volume
6
Turn the Button Click on or off
6
Adjust the Display Brightness
7
Screen on Time
7
Saving Changes and Exiting the Setup Menu
7
4 RPS Configuration
7
Start RPS
7
Enable the Keypad
7
Enter Security Company Information
8
Update and Reset the Control Panel
9
5 Specifications
9
Advertisement
Bosch D1265 Quick Manual (3 pages)
Touch Screen Keypad
Brand:
Bosch
| Category:
Keypad
| Size: 0.3 MB
Advertisement
Related Products
Bosch D1260B
Bosch D720W
Bosch D630
Bosch D626
Bosch D620
Bosch D621B
Bosch D623W
Bosch D625B
Bosch D1260 Series
Bosch D1257
Bosch Categories
Dishwasher
Washer
Oven
Power Tool
Dryer
More Bosch Manuals
Login
Sign In
OR
Sign in with Facebook
Sign in with Google
Upload manual
Upload from disk
Upload from URL