Sign In
Upload
Manuals
Brands
Honeywell Manuals
Network Hardware
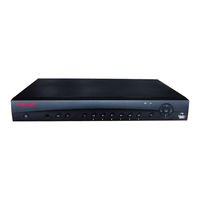
HEN08121(X)
Honeywell HEN08121(X) Manuals
Manuals and User Guides for Honeywell HEN08121(X). We have
1
Honeywell HEN08121(X) manual available for free PDF download: User Manual
Honeywell HEN08121(X) User Manual (248 pages)
Embedded
Brand:
Honeywell
| Category:
Network Hardware
| Size: 3.32 MB
Table of Contents
User Guide
1
Safety Instructions
7
Table of Contents
9
About this Document
21
Overview of Contents
21
Related Documents
22
Typographical Conventions
22
1 Introduction
25
Overview of the Embedded NVR Bundle IP Cameras
25
Features of the Embedded Network Video Recorder
26
Network Video Recorder Components
27
Figure 1-1 NVR Front Panel
27
USB 2.0 Mouse Components and Functions
31
Single-Click the Left Mouse Button
31
Double-Click the Left Mouse Button
31
Single-Click the Right Mouse Button
32
Click the Mouse Wheel
32
Other Mouse Functions
32
2 Installation
33
Alarm Connection
33
Alarm Configuration
33
Bi-Directional Communication Connection
34
Audio Output Device to a PC
34
Configuring to Hear Audio from the NVR
34
Connect
34
PC to an Audio Input Device
34
Figure 2-1 Enabling Bi-Directional Communication
34
Figure 2-2 Configuring to Hear from the NVR
34
Configuring to Hear Audio from the PC
35
Hard Disk Drive Installation
35
Hard Disk Drive Recommendations
35
Installing a HDD
35
Figure 2-4 Removing the NVR Cover
36
Figure 2-5 Loosening the Four Screws in the HDD Housing
36
Figure 2-6 Placing the HDD
36
Figure 2-10 Securing the NVR Cover
37
Figure 2-7 Securing the HDD to the NVR Housing
37
Figure 2-8 Connecting the HDD and the Power Cable
37
Figure 2-9 Replacing the NVR Cover
37
Network Connection
38
Figure 2-11 Network Connections
38
3 NVR Configurations
39
Logging in to Your NVR
39
Logging in
40
Figure 3-1 Multiple-Channel Display Mode
40
Figure 3-2 System Login Window
40
Figure 3-3 Electronic Keyboard
41
Live View
42
Preview Control
42
Figure 3-4 Main Menu
42
Preview Control Interface
43
Playback Control
44
Right-Click Menu
44
Main Menu
44
Figure 3-6 Right-Cut Menu
44
Search and Playback
45
Figure 3-9 Card Number Search Interface
49
Information
50
Figure 3-10 Information Tab
50
Figure 3-11 HDD Information Tab
51
HDD Information
51
Viewing the HDD Recording Time Information
51
Bps
52
Figure 3-12 HDD Recording Time Information Interface
52
Figure 3-13 BPS Interface
53
Figure 3-14 Log Tab
53
Log
53
Figure 3-15 Detailed Information about a Log File
54
Version
54
Figure 3-16 Version Tab
55
Online Users
55
Figure 3-17 Online Users Tab
56
Figure 3-18 Channel/Device Status
56
Remote Device Information Tab
56
Figure 3-19 Connection Log
57
Network Information
57
Figure 3-20 Network Test Tab
58
Settings
59
Figure 3-21 Network Load Interface
59
Configuring the General Settings
60
Figure 3-22 Setting Interface
60
Figure 3-23 General Settings Interface
61
Configuring the Encoding Settings
63
Figure 3-24 Encode Interface
64
Configuring the Schedule
66
Figure 3-25 Schedule Interface
67
Configuring RS232
68
Figure 3-26 Copy Interface
68
Configuring the Network
70
Figure 3-27 Network Interface
70
Figure 3-28 Network Setting Configuration Interface
72
Figure 3-29 IP Filter Configuration Interface
73
Figure 3-30 NTP Configuration Interface
75
Figure 3-31 Multicast Configuration Interface
76
Figure 3-32 Pppoe Configuration Interface
77
Figure 3-33 DDNS Configuration Interface
78
Figure 3-34 UPNP Configuration Interface
79
Figure 3-35 Port Info Configuration Interface
80
Figure 3-36 WIFI Connection Status
81
Figure 3-37 WIFI Setting Interface
82
Figure 3-38 Viewing WIFI Settings
84
Figure 3-39 Email Configurations Interface
84
Figure 3-40 Configuring FTP
85
Figure 3-41 Testing the FTP Setup
86
Figure 3-42 Network Setting Configuration Interface
86
Figure 3-43 FTP Configuration Interface
87
Figure 3-44 Message Indication FTP Connection Failure
88
Figure 3-45 SNMP Configuration Interface
89
Configuring Alarms
90
Figure 3-46 Auto Register Configuration Interface
90
Figure 3-47 Alarms Configuration Interface
91
Figure 3-48 Alarm Configuration Interface
95
Figure 3-49 PTZ Activation Configuration Interface
95
Configuring Detection Settings
96
Figure 3-50 Detect Configuration Interface
97
Figure 3-52 Camera Masking Configuration Interface
104
Configuring PTZ Settings
107
Figure 3-53 Pan/Tilt/Zoom Configuration Interface - Local
108
Figure 3-54 PTZ Configuration Interface - Remote
109
Figure 3-55 Pan/Tilt/Zoom Control Interface
109
Configuring Display Settings
110
Figure 3-56 Display Configuration Interface
111
Configuring Default Settings
112
Connecting to and Configuring the Remote Devices/Cameras
113
Configuring the Built-In Switch Setup
113
Figure 3-57 NVR Real Panel - Poe Ports
113
Configuring the Remote Device/Camera
114
Figure 3-58 Switch Settings Configuration Interface
114
Figure 3-59 Remote Device Configuration Interface
115
Figure 3-60 Manual Add Configuration Interface
116
Figure 3-61 Short-Cut to Remote Device Configuration Interface
116
Advanced Configurations
117
Figure 3-62 Remote Device Configuration Interface
117
Figure 3-63 Advanced Configuration Interface
117
Configuring HDD Management
118
Figure 3-64 HDD MANAGE Configuration Interface
118
Figure 3-65 HDD Setting Configuration Interface
120
Figure 3-66 Channel Settings Configuration Interface
120
Configuring Abnormality Settings
121
Figure 3-67 Abnormality Configuration Interface
122
Configuring Alarm Output
123
Configuring Manual Recording Settings
123
Figure 3-68 ALARM OUTPUT Configuration Interface
123
Figure 3-69 RECORD Configuration Interface
123
Configuring Account Settings
124
Figure 3-70 ACCOUNT Configuration Interface
125
Figure 3-71 Add Group Configuration Interface
126
Configuring Automatic Maintenance Settings
128
Figure 3-73 Modifying Password Configuration Interface
128
Figure 3-74 AUTO MAINTAIN Configuration Interface
128
Configuring Backup
129
Figure 3-75 BACKUP Configuration Interface
129
Shutting down the NVR
129
Figure 3-76 SHUTDOWN Dialog Box
130
4 Honeywell Configuration Tool
131
Starting the Honeywell Configuration Tool
131
Installing the Honeywell Configuration Tool
131
Figure 4-1 Honeywell Config Tool Wizard
132
Figure 4-2 User License Agreement
132
Opening the Honeywell Configuration Tool, Searching for Devices, and Opening a Web Client
133
Figure 4-3 Installation Is Complete
133
Upgrading a Single Device (IP Camera or NVR)
134
Figure 4-4 Configtool Interface
134
Figure 4-5 Configtool Login
134
Figure 4-6 Device Upgrade Login Interface
135
Figure 4-7 Config Upgrade Interface
135
Figure 4-8 Device Offline Message
136
Figure 4-9 Upgrade Interface
136
Upgrading the IP Devices (Batch Upgrade)
137
Figure 4-10 Configtool Login
137
Figure 4-11 Upgrade Interface
138
Figure 4-12 Open Interface
138
Figure 4-13 Upgrade Interface
139
Figure 4-14 Batch Upgrade Progress Message
139
Modifying the IP Address
140
Figure 4-15 Batch Upgrade Successful Message
140
Figure 4-16 Configtool Login
140
Figure 4-17 Selecting Net in the Configtool
141
5 Web Operation
143
Preparing to Use the Device Web Client
143
PC Requirements
143
Before You Log in
144
Logging in
144
Figure 5-1 IE Window
145
Figure 5-2 Configuring the Activex Controls
146
Figure 5-3 Login Interface
146
LAN Mode
147
Section 1: Function Buttons
147
Figure 5-4 LAN Mode Main Window
147
Figure 5-5 LAN Main Window Function Buttons
147
Section 2: Monitor Channels
148
Section 3: Open All Button
148
Section 4: Start Talk Button
148
Section 5: Instant Record Button
149
Section 6: Local Play Button
149
Section 7: PTZ Control Panel
149
Section 8: Image and Alarm Configuration Panels
149
Figure 5-10 Local Play - Select a File Interface
149
Section 9: Viewer Configuration Controls
150
Real-Time Monitoring
150
Figure 5-11 Live View Video Window
150
Controlling PTZ Camera
151
Figure 5-12 PTZ Controls
152
Configuring Image/Alarm out Settings
153
Configuring Image Settings
153
Figure 5-13 Image Settings
153
Configuring Alarm Output
154
Playing Back Recorded Video
154
Figure 5-14 Alarm out Configuration Interface
154
Figure 5-15 Playback Interface
154
Figure 5-16 List of Recorded Video Clips
155
Figure 5-17 Playing Back Video
155
Downloading Video
156
Figure 5-18 Downloading Recorded Video
156
Loading more
156
Enabling and Disabling Alarms
157
Figure 5-19 Download by File/Download by Time Interfaces
157
Figure 5-20 Alarm Configuration Interface
158
Configuring Settings
159
Configuring Remote Settings
159
Remotely Adding a Device/Camera
159
Figure 5-21 Remotely Adding a Device Configuration Window
160
Figure 5-22 Manual Add Configuration Window
161
Remotely Configuring Video and Audio
161
Figure 5-23 Video&Audio Configuration Interface
162
Figure 5-24 Snapshot Configuration Interface
163
Figure 5-25 Video Overlay Configuration Interface
164
Configuring the Channel Name
165
Configuring Network Settings
165
Configuring TCP/IP Settings
165
Figure 5-26 Path Configuration Interface
165
Figure 5-27 Channel Name Configuration Interface
165
Figure 5-28 TCP/IP Configuration Interface
166
Configuring the Network Connection
167
Configuring Wifi
167
Figure 5-29 Connection Configuration Interface
167
Configuring CDMA/GPRS for 3G
168
Figure 5-30 Wifi Configuration Interface
168
Configuring the Mobile Setup for 3G
169
Figure 5-31 CDMA/GPRS Configuration Interface
169
Configuring Pppoe
170
Figure 5-32 Mobile Setup Configuration Interface
170
Figure 5-33 Pppoe Configuration Interface
170
Configuring DDNS
171
Figure 5-34 DDNS Configuration Interface
172
Configuring Email Settings
173
Configuring the IP Filter
173
Figure 5-35 IP Filter Configuration Interface
173
Figure 5-36 Email Configuration Interface
174
Configuring Upnp
175
Configuring SNMP
176
Figure 5-37 Upnp Configuration Interface
176
Configuring Multicast
177
Figure 5-38 SNMP Configuration Interface
177
Configuring Auto Registration Settings
178
Configuring Events
178
Figure 5-39 Multicast Configuration Interface
178
Figure 5-40 Auto Register Configuration Interface
178
Configuring Detection Settings
179
Configuring for Motion Detection
179
Figure 5-41 Detect Configuration Interface
179
Configuring for Video Loss Detection
183
Figure 5-42 Video Loss Configuration Interface
183
Configuring for Camera Masking
184
Configuring Alarms
184
Configuring Local Alarms
184
Figure 5-43 Camera Masking Configuration Interface
184
Figure 5-44 Local Alarm Configuration Interface
185
Configuring Net Alarms
187
Figure 5-45 Net Alarm Configuration Interface
187
Configuring External Alarms
188
Configuring for no Signal
188
Figure 5-46 IPC External Alarm Configuration Interface
188
Configuring for Abnormalities
189
Figure 5-47 no Signal Configuration Interface
189
Configuring Storage
190
Configuring Schedules for Storage
190
Figure 5-49 Schedule Configuration Interface
191
Figure 5-50 Set Configuration Interface
191
Configuring Local Storage for Schedules
192
Configuring the HDD Group Settings
192
Figure 5-51 Local Storage Configuration Interface for Schedules
192
Figure 5-52 HDD Setting Configuration Interface
192
Configuring Recording Settings
193
Figure 5-53 Record Configuration Interface for Storage Settings
193
Configuring the Channel for Schedules
194
Figure 5-54 Channel Configuration Interface
194
Figure 5-55 Extra Stream Configuration Interface
194
Configuring Settings
195
Configuring General Settings
195
Figure 5-56 Image Storage Configuration Interface
195
Date & Time Settings
196
Figure 5-57 General Settings
196
General Settings
196
Figure 5-58 Date & Time Configuration Interface
197
Holiday Settings
197
Configuring Account Settings
198
Figure 5-59 Holiday Settings Configuration Interface
198
Configuring User Settings
199
Figure 5-61 Add User Configuration Interface
200
Configuring Group Settings
201
Figure 5-62 Modify User Configuration Interface
201
Figure 5-63 Group Configuration Interface
202
Figure 5-64 Add Group Configuration Interface
202
Configuring Display Settings
203
Figure 5-65 Modify Group Configuration Interface
203
Enabling and Disabling Alarm out Settings
204
Figure 5-66 GUI Configuration Interface
204
Returning to Default Settings
205
Configuring Backup Settings
205
Figure 5-67 Alarm out Configuration Interface
205
Figure 5-68 Default Settings Interface
205
Configuring Automatic Maintenance Settings
206
Figure 5-69 Import&Export Interface
206
Figure 5-70 Auto Maintain Configuration Interface
206
Configuring Pan/Tilt/Zoom Settings
207
Before Configuring PTZ Settings
207
Figure 5-71 Pan/Tilt/Zoom Local Configurations Interface
207
Figure 5-72 Pan/Tilt/Zoom Remote Configurations Interface
207
Configuring Preview Control Settings
208
Configuring System Information
208
Figure 5-73 Preview Control Configuration Interface
208
Configuring the Log
209
Figure 5-74 Version Configuration Interface
209
Viewing the Version
209
Figure 5-75 Log Configuration Interface
210
Viewing the Online Users
210
Logging out
211
Figure 5-76 Online User Configuration Interface
211
Figure 5-77 Login Interface
211
Appendix A Troubleshooting
213
Problem: the NVR Does Not Boot up Properly
213
Problem: the NVR Cannot Detect the Hard Disk
214
Problem: the Real-Time Video Color Is Distorted
214
Problem: Motion Detection Does Not Work
214
Problem: You Can Not Log into the NVR or Web Client
215
Problem: the Remote Control Does Not Work
215
Problem: You Have Forgotten the Local Menu Operation Password or Network Password
216
Problem: There Is no Video; the Screen Is Black
216
Problem: When Viewing Multiple Channels in the Client End, the Video Is Not Smooth
216
Appendix B Daily Maintenance
217
Appendix C Compatible SATA HDD
219
Appendix D Compatible USB 2.0 Devices
223
Appendix E Compatible Monitors
225
Appendix F Specifications
227
Index
231
Advertisement
Advertisement
Related Products
Honeywell HEN08141(X)
Honeywell HEN08161(X)
Honeywell HEN081 4 Series
Honeywell HEN081 3 Series
Honeywell HEN08103L
Honeywell HEN081 3V Series
Honeywell HEN081 3LV Series
Honeywell HEN04121
Honeywell HEN04111
Honeywell HEN04111(X)
Honeywell Categories
Thermostat
Controller
Control Unit
Security Camera
Accessories
More Honeywell Manuals
Login
Sign In
OR
Sign in with Facebook
Sign in with Google
Upload manual
Upload from disk
Upload from URL