Sign In
Upload
Manuals
Brands
HP Manuals
Laptop
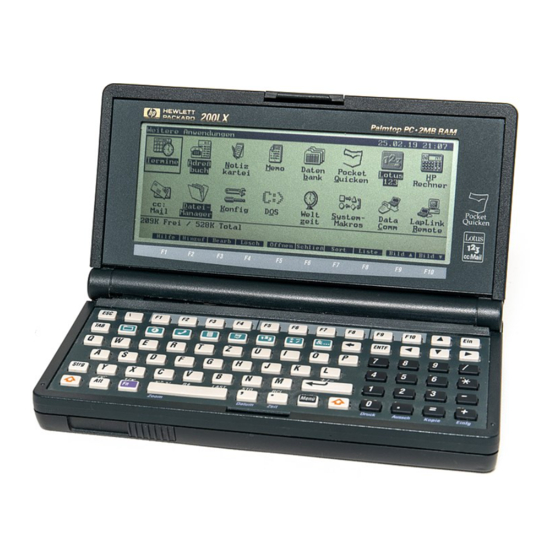
200LX
HP 200LX Palmtop PC Manuals
Manuals and User Guides for HP 200LX Palmtop PC. We have
1
HP 200LX Palmtop PC manual available for free PDF download: User Manual
HP 200LX User Manual (471 pages)
Palmtop PC
Brand:
HP
| Category:
Laptop
| Size: 12.83 MB
Table of Contents
Contents
6
Before You Begin
18
Product View
18
Hardware Features
19
Software Features
19
Green Application Keys
19
More Applications Screen
20
The Built-In Applications
20
Activating Password Protection
21
To Set or Change a Password
21
Managing Memory
22
Types of Memory in the Palmtop
22
To Change the Mode or Deactivate Password Protection
22
Saving Data
23
Backing up Data
23
Terminology
23
Using Memory Cards
24
Resetting Your Palmtop
25
Battery-Saving Tips
26
Application Screens
26
The Elements of an Application Screen
27
Controlling the Display Size with Zoom
27
To Change the Size of the Characters
27
PIM Application Views: List and Record
28
The Data List
28
An Appointment List
28
The Data Record
29
An Appointment Record
29
Screen Annunciators
30
Menus
30
Menu Commands and Function Keys
31
To Scan the Menu Commands
31
Using Dialog Boxes
32
To Cancel a Menu
32
Navigating Dialog Boxes and Records
33
To Move to a Field in a Record or a Dialog Box
33
To Select an Option Button
33
To Check and Uncheck a Box
33
To Use a Command Button
34
To Use a List Box
34
To Complete or Exit a Dialog Box Record
35
Keyboard Overview
36
Cancel and Undo Operations
38
Selecting Items in Lists
38
Standard Menu Commands
39
Deleting Items in Lists
39
Using File Commands
40
Specifying Files
40
To Specify the File Name in a Dialog Box
41
To Type the File Name Yourself
41
To Select the File Using the List Boxes
41
To View Files in the Current Directory - Wildcards
41
Setting Passwords for Files
42
Searching for Specific Text
42
To Set or Change a PIM or Pocket Quicken File's Password
42
To Delete a PIM or Pocket Quicken File's Password
42
Copying or Moving Information
43
The Clipboard: Copying, Cutting, and Pasting
43
To Highlight a Range of Text
43
To Move or Copy a Piece of Text
44
To Move or Copy an Item in a List
44
To Delete a Piece of Text
44
Smart Clip: Copying Multiple Data Fields from Records
45
To Clip Information from a PIM Application
46
Using Smart Clips with Check Boxes and Option Buttons
47
To Edit or Rename a Smart Clip
47
Getting Answers Fast: Online Help
48
To Delete a Smart Clip Definition
48
About 1-2-3
50
Differences between 1-2-3 on the Palmtop and 1-2-3 Release 2.4 on PC
51
Additions to 1-2-3 on the Palmtop
51
Deletions from 1-2-3 on the Palmtop
51
Modifications to 1-2-3 for the Palmtop
52
About Configuration Settings
53
To Set the Printer Configuration
53
Personal Information Management
54
The Appointment Book
55
Scheduling Appointments
56
Repeat Options
57
To Set a Snooze Alarm
60
To Schedule an Event
60
Types of Appointment Lists
62
Daily Appointment List
62
Weekly Appointment List
63
Monthly Appointment List
63
Six-Month Calendar - no Appointments
64
Moving Around Appointment Lists
64
To View All the Events for a Month
65
Tips for Scheduling
65
Changing the Current Date
66
Editing and Deleting Appointments
67
To Change a Repeating Appointment to a One-Time Appointment
67
To Restore a Deleted Appointment - Undo
68
To Delete All Appointments and To-Do Items before or after a Date
68
Running a Program or System Macro at a Certain Time
69
To Set an Appointment that Runs a Program or Macro
69
To-Do Lists
70
To Add a To-Do Item to the List
71
To Scan a To-Do List
71
Using Multiple Appointment Books
72
To Check off a Completed To-Do Item
72
More Information about To-Do Items
72
Translating Appointment Books
73
Setting Options and Defaults for the Appointment Book
73
Change Clock/Calendar/Next Appointment/Day Graph in To-Do List
74
To Change the Appointment Timeline Setting
75
To Change the Time Intervals in the Daily/Weekly Timeline
75
To Change the Default Settings for Appointments
75
To Change the Default Settings for To-Do Items
75
To Change the Alarm Volume and Sound
76
Commands for Custom Alarm Programming
76
Appointment Book Function Keys
77
To Turn off the Daily Greeting
77
The Phone Book and the Database
79
Adding to and Editing a Phone Book
80
To Delete a Phone Record
81
To Restore the Last Deleted Item - Undo
81
To Add or Delete a Field
81
Searching a Phone Book
82
To Remove the Data Card from the Phone List
82
To Customize the Information on the Data Card
82
To Look up a Name in a Phone Book - Speed-Locate
82
Using Multiple Phone Books
83
Translating Phone Books
83
To Find any Piece of Text in a Phone Book
83
Creating Your Own Database
84
To Translate an HP 96LX Phone Book to an HP 200LX Phone Book
84
About Database Structures
85
File Commands for Defining Databases
85
A Database Structure
86
Field Types for Database Structures
86
Defining a New Database Structure
87
To Add and Define the New Fields
87
To Move or Size a Database Field
88
To Add a Group Box with Option Buttons or Check Boxes
88
To Give a Field a Shortcut Key
88
To Edit or Delete a Field in the Define New Database Screen
89
To Save and Name the New Database
89
Modifying a Database Definition
92
To Edit the Database Structure
92
To Restore the Original Database Structure
92
To Duplicate a Database Structure
92
Modifying the Datacard
93
To Customize the Information on the Datacard
93
To Remove the Datacard from the Database List Screen
93
Searching a Database
94
Sorting Data Lists
94
To Change the Sorting Method
94
Rearranging the Columns in Data Lists
95
Defining Subsets of a Database
96
Function Keys for Rearranging Columns
96
Displaying Existing Subsets
97
Defining a New Subset
97
Using Check Boxes and Option Buttons in a Subset Definition
97
To Set an Option Button in a Subset Definition
98
Using the Category Field
99
To Use a Category List Box
99
To Edit a Category List Box
100
Using Multiple Criteria in a Subset Definition
101
Define Subset Screen for a Personal Phone List
101
To Define a Subset with Multiple Criteria
101
Field Selection Criteria Define Subset Screen
102
Subset Definition with Multiple Criteria
102
Advanced Subset Selection
103
Editing or Deleting Subset Definitions
103
To Edit/Rename/Delete a Subset Definition
103
To See the SSL Statement for a Subset Specification
103
SSL Syntax
104
Relational Operators
104
Arguments for Relational Tests
104
Boolean Operations
105
Testing Check Boxes and Option Buttons
105
To Apply an Operation on a String to any Field
106
Comparison of SSL and Define Subset Screen
106
SSL Examples
107
Limits While Using the Phone Book and Database
108
Phone Book and Database Function Keys
108
Function Keys for Define-New-Database and Modify-Database
108
Function Keys for the Phone and Data Lists
109
Function Keys for a Phone and Data Record - an Item
109
Function Keys for Defining Subsets and Smart Clips
110
World Time
111
City Lists
111
Specifying Your Local City
112
To Open a City's Record
112
To Look up a City - Speed-Locate
112
Adding a City to World Time
113
Editing or Deleting a City
115
Creating Your Own City List - Custom Cities
115
To Put a City in the Custom Cities List
115
Using the Map
116
To See a City on the Map
116
Converting Times Across Time Zones
117
About the Settings for Daylight Savings Time
118
To Change the DST Setting - a Shortcut
118
Using Subsets of the City List
119
Limits While Using World Time
120
World Time Function Keys
121
Function Keys for a City List or Map
121
Function Keys for a City Record - an Item
121
The Stopwatch
122
To Use the Countdown Timer
122
To Cause the Countdown Timer to Count Past Zero - Negative Time
123
To Stop the Countdown Timer at any Time
123
To Use the Alarm Clock
123
The Memo Editor
124
Creating a Memo
125
Editing a Memo
125
Moving Around a Memo
125
Saving Memo Files
126
To "Stamp" the Current Date or Time in a Memo
126
To Back up a Memo Onto a Memory Card
126
Saving Memos as ASCII Text Files
127
Settings for Saving Memo Files
128
Password Protection for Memos
128
To Turn Auto-Saving on or off
128
To Change the Default Memo File Name Extension
128
Formatting a Memo
129
To Start Boldface, Underlined, or Bold Underlined Text in a Memo
129
To Change the Typeface of Existing Text
129
To Set Headers and Footers/To Set the Margins
129
Editing or Reading a Memo
130
To Insert a Page Break - for Printing
130
To Add Page Numbers - for Printing
130
To Add Date and Time Fields - for Printing
130
To Delete a Block of Text
131
To Cut, Copy, Paste
131
To Save Editing Changes
131
To Cancel Editing Changes
131
Copying or Deleting Information
132
Smart Clip: Copying Multiple Fields from Records
132
To Clip Information from Another Application into a Memo
132
Deleting, Copying or Inserting Memos
133
Searching a Memo File
134
Options for Displaying the Memo
134
To Find any Piece of Text in a Memo
134
To Change the Size of the Characters in the Display
134
To Change the Spacing between Lines in the Display
135
To Display or Hide the Ruler
135
To Display or Hide the Status Bar Information
135
To Display or Hide Control Characters
135
Using Outline-Style Numbering
136
Starting Outline (Hiererchical) Numbering
137
To Create a Sub-Topic (Subordinate Entry) and Increase Indentation
137
To Create a Super-Topic (Superior Entry) and Decrease Indentation
137
To Enter Text Without Numbering
137
Editing Existing Outlined Text
138
Printing a Memo
138
To Remove Numbering from a Subtopic
138
To Promote or Demote Existing Text
138
Setting up Printing Information
139
About Printing to a File
139
To Print a Memo from the Palmtop
139
To Enter a Control Code on the Palmtop
140
Memo Editor Function Keys
141
The Note Taker
142
To Open a Note Record
142
Creating a Note
143
To Add a New Note
143
To "Stamp" the Current Time or Date in a Note
143
To Save a Note as an ASCII (Unformatted Text) File
143
Editing or Deleting Notes
144
To Copy or Move Note Information
144
To Copy a Complete Note Record
144
To Insert an ASCII Text File into a Note
144
Changing the Data Card
145
To Clear (Erase) the Text of a Note
145
To Delete a Note
145
To Remove the Data Card from the Notes List
145
Searching the Note Taker
146
To Customize the Data Card Definition
146
To Look up a Note - Speed-Locate
146
To Find any Piece of Text in the Notes
146
Using Multiple Note Taker Files
147
Using Subsets of the Note Taker
147
Limits While Using the Note Taker
147
Note Taker Function Keys
148
Function Keys for the Note List
148
Function Keys for a Note Record - an Item
148
Function Keys for the Full Screen Note
149
Pocket Quicken
150
About Files and Accounts
151
To Set up an Additional Account
151
To Display the List of Accounts
152
To Select Another Account to Use
152
To Edit Information about an Account
152
To Delete an Account
153
To Trim Your Data File
153
To Set up Additional Files
153
About Categories and Groups
154
To Choose Another File
154
Add Transaction Screen
154
What's a Category?
155
To Display the Category List
155
To Add a New Category or Subcategory to the List
155
To Change a Category or Subcategory
155
What's a Group?
156
To Delete a Category or Subcategory from the List
156
To Merge Two Categories
156
To Change the Group Field Title
157
To Display the Group List
157
To Add Groups and Subgroups to the List
157
Use the Group Field for Expense Reporting
158
Using the Register
159
Entering Transactions
160
The Add Transaction Screen
160
Tasks that Start from the Register
160
To Add a Transaction to a Pocket Quicken Account
162
To Edit a Transaction
163
To Delete a Transaction
163
To Void a Transaction
163
Using Quickfill and Quickkeys
164
Splitting Transactions
164
Transferring Money between Accounts
165
To Edit a Split Transaction
165
Changing Your Entry Preferences
166
To Record a Transfer Transaction
166
Sharing Data with Desktop Quicken
167
Using the Connectivity Pack to Merge or Synchronize Quicken Files
167
Importing and Exporting Pocket Quicken Files
167
To Export Pocket Quicken Data from the Current Account
168
To Import a .QIF File into Pocket Quicken
168
Disk Space
169
Balancing Your Pocket Quicken Checkbook
170
The General Reconciling Procedure
170
Balancing Your Account for the First Time
171
Reconciling the Account
172
Solving Problems
173
Correcting Differences
173
Check the Number of Payments and Deposits
173
Having Pocket Quicken Adjust for Differences
174
Check the Dollar Amounts of Items
174
Check the Opening and Ending Balances
174
To Have Pocket Quicken Add a Balance Adjustment
174
Updating Your Previously Reconciled Balance
175
Adding Earlier Transactions to Pocket Quicken
176
Creating and Printing Pocket Quicken Reports
177
To Create a Report File for the Current Register
177
To Create a Report File for All Current Balances
178
To Create a Report File for Categories
179
The HP Financial Calculator
181
Calculator Basics and Math Functions
182
Simple Arithmetic
183
About the Calc Line
183
The Calculator Keyboard
184
About the Special Calculator Keys
185
Operator Priority
186
Percent
187
Other Keyboard Arithmetic
187
Using the Automatic Constant in Calculations
188
Storing and Recalling Numbers
189
Using the History Stack
189
Using Registers
191
Viewing Registers
191
Using STO and RCL
191
Doing Arithmetic Inside Registers
191
Using the M Register
192
M Register Keys in the Arithmetic Application
192
Moving Values between the Calc Line and 1-2-3
193
The Point-And-Shoot Method of Data Entry
193
To Copy the Rightmost Number in the Calc Line to a 1-2-3 Cell
193
To Copy a Number in a 1-2-3 Cell to the Calc Line
193
Clearing Information from Calculator Memory
195
Using RPN with the Calculator
195
Reverse Polish Notation (RPN)
195
Technical Math Functions
196
Page 1 Set of Math Functions
197
Changing the Angle Mode
198
Page 2 Set of Math Functions
198
Page 3 Set of Math Functions
199
Page 4 Set of Math Functions
201
Business Percentage Calculations
202
Percent Change and Percent of Total
202
Markup and Margin
202
To Calculate Percent Change
203
To Calculate Percent of Total
203
To Calculate Markup and Margin
203
Time Value of Money and Interest Conversions
204
The TVM Screen
204
Switching TVM Cases
205
Clearing TVM Variables
205
Making TVM Calculations
206
Conventions for Entering TVM Values
206
Calculating Amortization
210
To Make Amortization Calculations
212
Sending an Amortization Table to 1-2-3 or a Printer
216
To Print an Amortization Table
216
To Send an Amortization Table to the Current 1-2-3 Worksheet
216
Calculating Interest Rate Conversions
218
If Compounding and Payment Periods Differ
219
Additional TVM Examples
221
Yield of a Discounted or Premium Mortgage
221
Loans with Fees
223
A Tax-Free Account
225
A Taxable Retirement Account
227
Uneven Cash Flow Calculations
229
NPV and IRR%: Discounting Cash Flows
229
Making Cash-Flow Calculations
230
The Cash-Flow Function Keys
231
Uneven Cash Flow Examples
231
Plotting
236
Currency and Other Unit Conversions
237
Converting Currencies
237
To Change Exchange Rates
237
Changing the List of Currencies
238
To Calculate Exchanges
238
To Change the Name of a Currency
238
To Convert Units of Length, Area, Volume, Mass or Temperature
239
Statistics
241
To Enter Statistical Data
241
Saving Statistical Data in a File
242
To Edit a List of Data
242
Data Editing Function Keys
242
Statistics Calculations
243
Stats Function Keys
243
To Calculate Weighted Mean and Grouped Standard Deviation
244
Curve Fitting and Forecasting
245
Plotting the Curve Model for Your Data
248
To View Statistical Summations
248
Date Calculations
249
About Calculator Date Formats
249
Date Formats: Calculator Vs. Setup Utility
250
To Clear the Date Calculation Variables
250
Using the Solver and Function Plotting
251
The Solve Catalog
251
Entering and Editing Equations
252
To Enter an Equation and Its Name
254
Calculating with Your Solver Equations
255
Clearing and Deleting Solver Equations and Variables
255
To Edit an Equation or Its Name
255
To Delete and Empty Line, a Name or an Equation And/Or Its Variables
256
To Delete All Variables And/Or All Equations
256
Using Multiple Equation Lists
257
Solve Catalog Function Keys
257
Using the Solver in a 1-2-3 Worksheet
258
To Restore the Solve Cell to Its Previous Value
259
To Set up a Solve Worksheet
259
To Use a Solver Worksheet
259
How the Solver Works
261
Halting and Restarting an Interative Search
262
Entering Guesses
262
Rules for Writing Equations
263
Length of Equations
263
Variable Names of Equations
263
Constants
264
Functions
264
Operators, Parentheses, and the Order of Calculations
264
Solver Functions
265
Date Formats
265
Typing Aids for Solver Functions
271
Solve Editor Function Keys
271
Conditional Expressions - if Function
272
Order of Logical Operations
272
Creating Function Keys for Multiple Equations - S Function
273
The TVM Functions
274
The Summing Function - SIGMA
275
Examples of Solver Equations
276
Simple Annual Interest
276
Advance Payments - Leasing
277
Discounted Notes
278
Moving Average
279
Simulating a Toss of Dice
281
Distance between Two Locations
282
Finding Several Solutions to an Equation
283
Creating Solver Files on a PC or Another Editor
285
Function Plotting
286
To Draw a Graph
286
To Zoom in
286
To Zoom out
287
To Display the Coordinates of any Point on the Screen
287
To Display a Function's Value for any Point on the Curve
287
To Digitize a Point's Coordinates (Full Accuracy of Coordinates)
287
To Solve for the Roots of a Function Graphically
288
To Find the Coordinates of an Extremum (Maximum or Minimum)
288
How Functional Plotting Works
292
Selecting the Expression to Plot
292
Setting the Plot Conditions
293
Interacting with the Graph
294
Configuring and Customizing the Calculator
297
Configuration Options
297
To Change the Number Format
297
To Change the Calculator Modes
297
Creating Your Custom Calculator Application
298
To Change the Startup Applications
298
To Start Your Custom Application from Another Application
298
To Make Custom Your Startup Application
298
System Management
299
The Setup Utility
300
Setting the Date and Time
301
Specifying Audio Volume and Display Intensity
302
Allocation Memory Btw System RAM and RAM Disc for 200LX 1Mb and 2MB
303
To Adjust the Display Contrast from any Application
303
Guidelines for Choosing a System Ram/Ram Disk Division
303
To Change RAM Memory Allocation between System and Disk
303
Allocating Memory Within System RAM for 200LX 1MB and 2MB
304
Clipboard System RAM
304
Static Data System RAM
304
DOS System RAM
304
Changing Country Defaults, Punctuation, and Code Page Settings
305
How to Display Currency Symbols
305
Punctuation Symbols
306
Specifying the Sorting Order for Lotus 1-2-3
307
Specifying a Topcard or Picture Display
307
To Fill out a New Topcard
307
To Substitute a Customized Graphic Image for the Topcard
307
Closing Com1 to Save Power
308
To Remove Your Graphic Image and Restore the Topcard
308
The Filer and File Management
309
The Root Directory on Drive C
309
Take Care of Your Data
310
Working with Files
310
To Copy or Move a File or Directory
311
To Delete a File or Directory
311
To Attempt to Recover Deleted Files or Directories
311
To Rename a File or Directory
312
To View the Contents of Text (ASCII) Files
312
To Run an Executable File
312
To Search for Text in a File
312
Viewing a Directory
313
File List View
314
Directory Tree View
314
To Display a Subset of the Current Directory
315
To Display a Complete Directory Listing When Viewing a Subset
315
To Choose the Way Files Are Sorted in a Directory Listing
315
Changing the Current Directory
316
Using Plug-In Memory Cards
316
To Reach a Higher-Level/Lower-Level Directory
316
To Format a Plug-In Memory Card
316
Backing up a Directory File
317
Directories and File Name Extensions Used by Palmtop Applications
318
Using the Split Screen
319
To Switch between Split and Dull Screen Display
319
To Move the Highlight between Split Windows
319
To Copy or Move Files and Directories Using a Split Screen
319
Transferring Files between Your HP 200LX and Another Computer
320
Transferring Files Using an IR Connection
320
To Configure an HP 200LX for IR Communication
321
To Position the Two Computers for IR Communication
321
To Transfer Files and Directories by IR between Two Palmtops
321
Transferring Files between an HP 100LX and an HP 200LX
322
To Switch a Window between Local and Remote Directory Displays
322
To Turn an IR Connection off
322
Transferring Files between and HP 95LX and an HP 200LX
323
To Configure an HP 95LX for IR Communication
323
To Transfer Files and Directories by IR between HP 96LX and HP 200LX
323
System Macros
325
To Create a System Macro from the System Macro Application
325
To Create a System Macro While Display9Ing each Key Symbol
326
To Create a System Macro from Another Application
326
To Run a System Macro
326
To Edit a System Macro
326
Creating Macros that Execute Other Macros
327
To Instruct a Macro to Run Another Macro
327
Saving and Opening Sets of System Macros
328
Clearing (Deleting) System Macros
328
System Macros and Lotus 1-2-3
329
System Macros Examples
329
Managing Your Applications
331
Installing Applications
331
To Install an HP 200LX-Type (SMC) Application
331
To Add a Program to the Application Manager
332
Icons View and List View of Applications
333
Starting, Quitting, and Deleting Applications
334
To Edit the Applications List
334
To Start an Application Using the Application Manager
334
Types of Memory
335
To Quit an Open Application
335
To Delete an Application You Added
335
Determining Memory Usage
336
Maximizing System RAM
336
To Check the Amount of Available Memory
336
To Close All Applications/To Close the System Manager
336
To Restart the System Manager
337
To Change AUTOEXEC.BAT to Release System RAM
337
MS-DOS in Your Palmtop PC
338
Accessing the DOS Prompt
338
About the System Manager Program
339
Files and Directories
340
Valid Characters for File and Directory Names
340
Reserved File Names
340
Reserved File Name Extensions
341
Special Palmtop File Name Extensions
341
DOS Commands in Your Palmtop
342
Standard DOS Commands
343
DOS Command Syntax
343
CONFIG.SYS Commands Available in Your Palmtop
343
MS-DOS and Batch Commands Available in Your Palmtop
344
Special Utility Commands
345
Cic100/Gen 1
345
Fdisk100
345
Dispctl
346
Serctl
346
Keybez
346
Supported Country NLS Defaults
348
How to Use KEYBEZ
348
To Expand a KIT File
348
To Create a Modified AUTOEXEC.BAT File
349
Installing DOS Applications
350
KIT Country Options
350
KIT File Format
350
Tips on Running DOS Applications
351
To Add a DOS Applications to the Application Manager
351
To Execute F11 and F12 on the Palmtop
351
To Generate IBM Numeric Keypad Keys on the Palmtop
351
How to Execute IBM Numeric Keypad Keys
352
To Load a TSR
352
To Run a Program from Drive a
352
Controlling the Appearance of a DOS Display
353
To Change the Position of the Annunciators
353
To Zoom on a DOS Display
353
To View All Parts of a Zoomed Display/To Invert DOS Display Colors
353
Customizing Your System
354
About the MS-DOS Startup Procedure
354
To Change Gray Shades
354
Boot (Reset) Options
355
To Select a Default Drive Option
356
External Communications
357
Datacomm
358
Configuring for Datacomm
359
To Change the Basic Configuration Settings
359
Choices in the Settings Dialog Box
360
To Change the Phone Configuration Settings
360
Choices in the Phone Settings Dialog Box
360
To Change the Advanced Configuration Settings
361
Choices in the Advanced Settings Dialog Box
361
Using Configuration Files
362
To Save the Current Configuration Settings in a File
362
To Choose an Existing Configuration File
362
To Choose the Default Configuration Settings
362
Preparing Your Hardware
363
Making Series Connections
363
Serial Connections for the Palmtop
364
Pin Assignments for the Palmtop Port and the 9-Pin Connector
365
Beginning and Ending a Communication Session
366
Hangup
366
Customizing Your Display for Datacomm
367
To Change between 64X18 and 80X25 Displays
367
To Move the 64X18 Window Around the 80X25 Screen
367
Window Moving Keys
367
Capturing Data in a File
368
To Scroll up to 99 Lines
368
Capture File Filtering Options
368
Automatic Datacomm Procedures
369
Special Characters for Script Files
369
Transferring Files
370
To Specify an Existing Script File for a Logon Procedure
370
To Use a Script File While a Datacomm Connection Is Active
370
Character Translation between Code Pages
371
To Enable Character Translation
372
To Create a CTF File
372
Formatting Rules Used in the above Sample File
373
To Make a CTF File Part of the Current Configuration
373
Descriptions of CTF File Commands
374
Using a Modem with Your Palmtop PC
376
Connecting to a Serial Modem
377
Connecting to a Card Modem
377
Using a Card Modem in the Plug-In Slot
378
About Batteries and Card Modems
378
Using a Printer with Your Palmtop PC
379
Equipment You Need
379
Preparing to Print Using Serial Connection
380
Preparing to Print Using Infrared
380
Printing
380
Printing from PIM Applications
381
To Print Items in a List - List Style
381
Appointment Records Printed in Custom Style, All Fields
382
Symbols for Printed To-Do Lists
382
Printing to a File - Creating an ASCII Data File
383
Setting up Printing Information - Setup
383
To Print Records (Details) of Items - Custom Style
383
To Add Custom Field Choices
383
CC:mail
384
Starting CC:mail the First Time
385
Batch Transfer
385
Interactive Connection
385
Receiving and Reading Messages
386
Replying to Messages
387
Creating and Sending Messages
387
About Folders
388
To Move a Message to Another Folder
388
Types of Address Books or Lists
389
Available Address Books
389
To Add Individuatl Names to Your Local Address Book
389
To Capture Name from Piece of Mail and Add It to Local Address Book
390
To Delete an Individual's Name from You Local Address Book
390
To Automatically Update Your Local Address Book
390
To Create Mailing Lists
391
To Delete a Name from a Mailing List
392
To Delete an Entire Mailing List
392
To Find a Name in a List - Speed-Locate
392
Addressing Options
393
To Address Your Message
393
Managing Your Messages
394
To Save a Message You've Just Completed
394
To Save a Message in an MS-DOS File
394
To Copy an Attached DOS File from a Received Message
394
To Move or Copy a Message
395
To Delete a Message
395
Printing in CC:mail
396
Importing and Attaching Files to a Message
396
To Print a List of All the Messages in a Folder
396
To Print the Text of Selected Messages in a Folder
396
Changing Your Communication Settings
397
To Change the Directory that Contains Your Mail Messages
397
To Change Your Password
397
Understanding CC:mail's Host
398
Understanding CC:mail's Prefix
398
To Modify Your Host - Your Current Set of Connect Settings
398
Creating Another Modem File
399
To Create a New Host - a New Set of Connect Settings
399
To Delete a Host
399
Backslash
400
Circumflex
400
Using an Interactive Connection to the Post Office
401
To Read a New Messages When Using an Interactive Connection
401
To View Selected Messages During an Interface Connection
402
Using Laplink Remote Access
403
Running Laplink Remote Access on Your Palmtop
404
Batteries and Environmental Limits
409
When to Replace Batteries
409
Removing and Installing Batteries
410
Rechargeable Batteries
412
To Charge Rechargeable Batteries Inside the Palmtop
413
AC Adapter Information
414
Environmental Limits for Your Palmtop and Plug-In Cards
414
Character Set
415
Generating Special Characters
418
South and East European Language Support
419
How to Access Character Sets and Keyboard Layouts
419
Running KEYBEZ
420
Printing Configurations
421
Keyboard Overlays and Code Page Tables
421
Greek and Cyrillic Overlays
422
Hungarian and Polish Overlays
423
Slavic and Turkish Overlays
424
CP 437G (PC Latin/Greek)
425
CP 437T (PC Turkish)
426
CP 852 (PC Latin-2)
427
CP 866 (PC Cyrillic)
428
Games
433
Index
434
Advertisement
Advertisement
Related Products
HP 2000/5700
HP 2000-210
HP 2000-211
HP 2000-350
HP 2000-219
HP 2000-216
HP 2000-2a10nr
HP 2000-bf69wm
HP 2000
HP 2000-410us
HP Categories
Desktop
Laptop
Server
Monitor
Switch
More HP Manuals
Login
Sign In
OR
Sign in with Facebook
Sign in with Google
Upload manual
Upload from disk
Upload from URL